Saturday, December 31, 2016

A Look Back

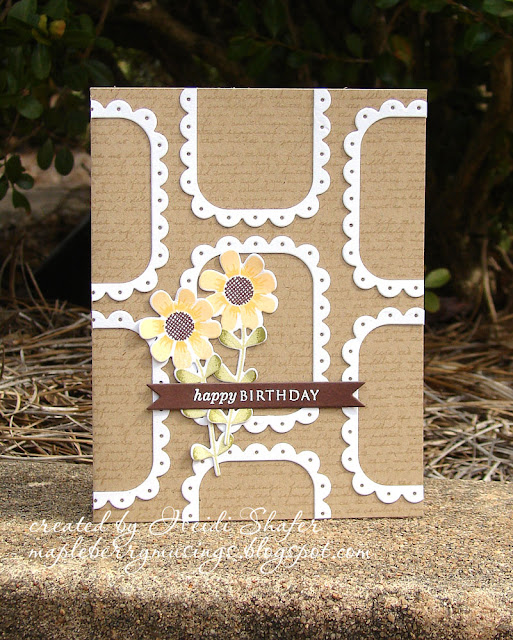
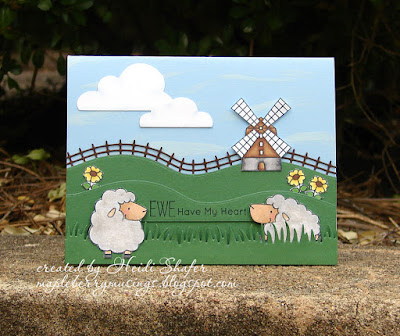
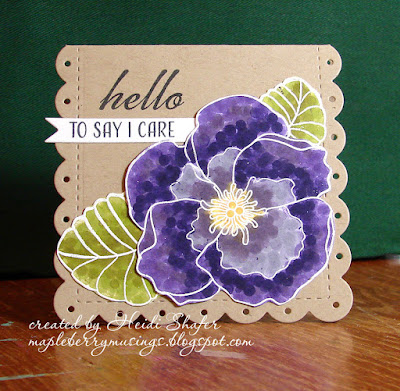
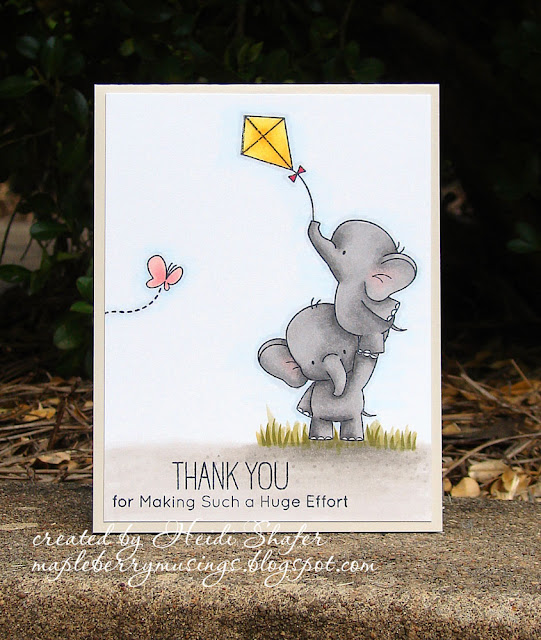
It's been an interesting year.  A mix of wonderful things and tough things.  I didn't stamp as much as I hoped, but I still managed to do eighty-four posts regardless.  Maybe I'll break that hundred-post ceiling in 2017.  Who knows?  Before this year ended, I wanted to take a look back at some of my favorite cards made in 2016.  Click on the pictures to see the original posts.  :)

http://mapleberrymusings.blogspot.com/2016/02/papertrey-ink-9th-anniversary-my-smiles.html

http://mapleberrymusings.blogspot.com/2016/02/papertrey-ink-9th-anniversary-birthday.html

http://mapleberrymusings.blogspot.com/2016/05/watercolor-hugs.html

http://mapleberrymusings.blogspot.com/2016/06/camp-create-ewe-have-my-heart.html

http://mapleberrymusings.blogspot.com/2016/07/camp-create-watts-up.html

http://mapleberrymusings.blogspot.com/2016/07/camp-create-hello-dear-friend.html

http://mapleberrymusings.blogspot.com/2016/07/camp-create-hb2u.html

http://mapleberrymusings.blogspot.com/2016/07/stamp-faire-2016-starry-night.html

http://mapleberrymusings.blogspot.com/2016/07/stamp-faire-2016-pointillism-play.html

http://mapleberrymusings.blogspot.com/2016/08/camp-create-stacked-elephants.html

http://mapleberrymusings.blogspot.com/2016/11/ink-it-up-with-leigh-penner-i-cant-even.html

A lot of these cards were made during the summer, my most prolific time stamping this year.  I moved my studio in November to my boys' old room.  I'm still settling in to the new location and figuring out how best to make it work.  I love all the extra space.  Not to mention, it is fantastic to have my cardstock in the same room! 

It's been fun to look back at this year's creations.  Here's to a brand new year, new creations, and new experiences!

Wednesday, December 28, 2016

Ink It Up with Leigh Penner: Hip Reindeer Tag


Welcome back for the second December installment of Ink It Up!  Every second and fourth Wednesday, Leigh Penner and I post a project using uninked sets.  I am showing the last of this year's Christmas tags for my family.  It's actually the second design I created, but I wanted to save these for my Ink It Up post because I used three different new stamp sets.  Three!  They are from the Candy Cane Lane Stamp of Approval kit by Catherine Pooler Designs.  Not only that, I used Nuvo Crystal Drops for the first time.  I love them!  Gimme all the pretty colors, please.  :)


Isn't that darling?  I cut the two tag layers using Tag Sale #8 from Papertrey Ink in Pure Poppy and Kraft cardstock.  On the Pure Poppy base, I stamped the Peppermint Stick Background in VersaMark ink.  I did the same thing on the Kraft tag layer, but using a sentiment from Merry & Bright Boughs.  I like the subtle background it created.  I stamped the word "noel" from Hip Holiday on the bottom in black ink and then glued the layers together.

That adorable reindeer is from Hip Holiday.  I stamped him in Dark Chocolate ink on white cardstock and then cut it with the matching die.  I added his little nose using Red Berry Nuvo Crystal Drops.  That stuff totally holds dimension!  They are just as high and rounded as when I first squeezed it out.  Love!  I was so tempted to add drops of different colors to his antlers to mimic Christmas lights, but I ultimately decided to keep it simple.  That way the focus is on that cute red nose.  I popped up the reindeer with dimensionals and added him to the tag.  Lastly, I tied on some red and white baker's twine.


I'm really pleased with these tags.  I like the simplicity!  I have fun making the family tags every year and my kids love to guess whose is whose.  It's one of my favorite traditions now!  Be sure to pop over to Leigh's blog, To the Full, to see her post today.

Stamps:  Hip Holiday, Merry & Bright Boughs, Peppermint Stick Background (Catherine Pooler Designs)
Ink:  Tuxedo Black (Memento); VersaMark; Dark Chocolate (Papertrey Ink)
Paper:  Kraft, Pure Poppy, White (Papertrey Ink)
Misc:  Hip Holiday dies (Catherine Pooler Designs); Tag Sale #8 die (Papertrey Ink); Red Berry Nuvo Crystal Drops

Tuesday, December 27, 2016

Penguin Tag

Here's another set of tags that I made for this year's gifts.  Two of my kids suggested a penguin, so I used this one from Punch Pals by Stampin' Up.  Other than the hand cutting, this is a quick design.


I cut a tag base using the Tag Sale #2 die by Papertrey Ink.  I also cut it out of patterned paper from the Winter Frost dsp stack and glued them together.  I cut another piece from white cardstock, first with the tag die, and then with the In the Meadow die by Papertrey Ink to get the snowy slope.  I covered it with Crystal glitter and glued it to the bottom of the tag.


I stamped the penguin on white cardstock and colored it with Stampin' Up markers.  I added glitter to the scarf using a glue pen.  After fussy-cutting the penguin, I adhered it to the snowy hill on the tag.  Using the Tag Sale #10 die, I cut banners from both white and Pool Party cardstock.  I stamped the sentiment from Winterberry with black ink, layered them together, and glued them to the tag.


As a final touch, I tied on some white satin ribbon.  The tags turned out darling!  My kids really loved this one.  I'll be back tomorrow to post the last tag design for this year.


Stamps:  Punch Pals (Stampin' Up); Winterberry (Papertrey Ink)
Ink:  Tuxedo Black (Memento)
Paper:  White (Papertrey Ink); Pool Party, Winter Frost dsp stack (Stampin' Up)
Markers:  Pool Party, Going Gray, Tangelo Twist (Stampin' Up)
Misc:  Tag Sale #2 die, Tag Sale #10 die (Papertrey Ink); Crystal fine glitter (Martha Stewart); white ribbon

Monday, December 26, 2016

Joy Wreath Tag

It's been a lovely Christmas weekend.  My college kids are home and we got to Skype with our missionary on Christmas day.  I'm popping in to post one of the tags I made for family gifts.  This one uses the Wondrous Wreath set by Stampin' Up.


I cut Kraft cardstock with the Tag Sale #4 die by Papertrey Ink and stamped the word "joy" in the center.  It's from the Merriest stamp set by Avery Elle.  I love the font in that set!  I stamped the wreath in Garden Green ink on white cardstock and then stamped the second leaf layer in the same ink.  I stamped the berries in Real Red ink. 


The dies for this wreath gave me fits!  It's easy to line up the main wreath die, but the center piece was a pain.  You can't see through it.  I only managed to cut one of the centers perfectly aligned.  I even tried cutting first and then stamping, but that didn't work well because the die edge impresses into the cardstock so the stamping wasn't even.  There are several discarded wreaths in my trash can.  Except for the die struggles, however, these tags were quick to make.


I stamped the bow in Real Red ink and cut it out with the matching die.  I added Ruby Slippers Nuvo Crystal Drops over the berries for dimension and a touch of glitter.  I love how it looks!  I popped the wreath up with foam tape, and once I tied on some red satin ribbon, the tags were done.  I'll post the other two tag sets this week, so stay tuned.  :)

Stamps:  Wondrous Wreath (Stampin' Up); Merriest (Avery Elle)
Ink:  Garden Green, Real Red (Stampin' Up); Tuxedo Black (Memento)
Paper:  White, Kraft (Papertrey Ink)
Misc:  Wonderful Wreath dies (Stampin' Up); Tag Sale #4 die (Papertrey Ink); Ruby Slippers (Nuvo Crystal Drops); red ribbon 

Wednesday, December 14, 2016

Ink It Up with Leigh Penner: Peace Nativity Tag


Welcome to the first Ink It Up post for December!  Leigh Penner and I post something twice a month, on the second and fourth Wednesdays, using uninked stamp sets.  My project today also includes a die that hadn't been used yet, along with a new color.  I needed to make a tag to include in my missionary son's Christmas package.  He specifically requested one even though he won't be home for the usual mystery tag tradition.  He's been gone a month now.  I couldn't let him down!  I miss that boy.


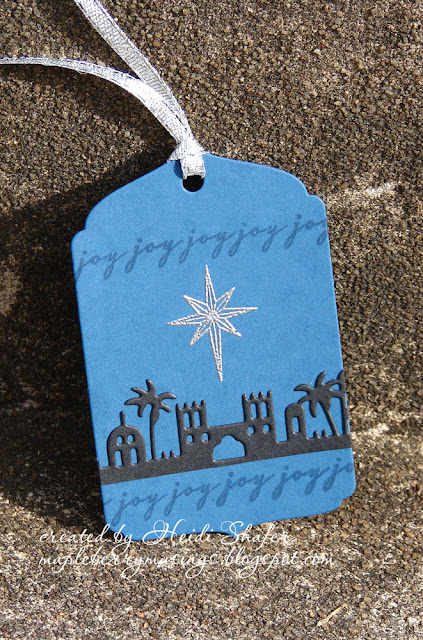
I cut the tag using Dark Indigo cardstock and the Tag Sale #4 die by Papertrey Ink.  It's my favorite tag die, so I use it a lot!  I cut the Nativity Border die by Taylored Expressions out of silver glitter paper first and then with the tag die so it would nest nicely.  After gluing it in place, I embossed the word "hope" from Spirit of Christmas by PrintWorks with white powder.  I stamped another sentiment from that set in Dark Indigo ink on a white Double-Ended Banner die cut.  Once I punched a hole in the end, I tied white ribbon through both pieces.  I used a bit of narrow silver ribbon to add a bow just above the tag.


Very simple, but I thought it was appropriate for my son while serving on his mission.  Our home life is adjusting to his absence, but it has been hard to let him go.  He's loving it, however, and that's all that matters!  I will be posting the rest of this year's tags once I get them finished.  Make sure you pop over to Leigh Penner's blog, To the Full, to see her Ink It Up post.

Stamps:  Spirit of Christmas (PrintWorks)
Ink:  Dark Indigo (Papertrey Ink); VersaMark
Paper:  White, Dark Indigo (Papertrey Ink); silver glimmer paper (Stampin' Up)
Misc:  Tag Sale #4 die, Double-Ended Banner die (Papertrey Ink); Nativity Border die (Taylored Expressions); white embossing powder (Filigree); white and silver ribbon

Here's another nativity tag that I created last year.  Click on the picture to see the original post.

http://mapleberrymusings.blogspot.com/2015/12/bethlehem-tag.html

Wednesday, November 9, 2016

Ink It Up with Leigh Penner: I Can't Even


The last two weeks are a blur.  My son Ben left for his mission yesterday and I miss him terribly.  Between his preparations and the house basement repair, not to mention plenty of other things, I feel completely depleted.  Drained.  Because Life.  Can I quit being an adult now?  HA!  Life keeps moving on.  In all the crazy, I forgot my Ink It Up post again.  So this stamp set by Stamping Bella immediately came to mind.  It's called the chicks who "couldn't even".  Seriously appropriate, because this is exactly how I feel right now.


Humor is the best medicine, right?  I'm also listening to Christmas music this morning.  Don't judge.  I bought the brand new Straight No Chaser and Gentri Christmas albums.  Music always makes me feel better.  My house feels very empty right now.  I'm counting down the days until my two oldest kids come home for their college break at the holidays.  Usually I wait until after Thanksgiving to listen to my vast Christmas music collection, but not this year.  I need a shot of happy.

I love the adorable chicks in this stamp set.  Who hasn't had days or weeks like this?  I bought it earlier this year and it's been sitting in my unused stash patiently waiting its turn.  Today is it!  It was very therapeutic to color this simple image with my Copic markers.  I mounted the panel on a white scalloped card base.

Simple and to the point.  This card makes me smile.  Inside, I stamped the chick lying flat on its back.  lol  But yes, I can do this.  Just give me a few days!   :)  Hop over to Leigh Penner's blog, To the Full, to see her Ink It Up card.

Stamps:  the chicks who "couldn't even" (Stamping Bella)
Ink:  Tuxedo Black (Memento)
Paper:  White (Papertrey Ink)
Copic:  0, C1, C3, E08, E19, E42, E55, E99, Y11, Y15, Y17, Y26, Y35, YR15, W5
Misc:  Noted: Scalloped A1 die (Papertrey Ink)

Wednesday, October 26, 2016

Ink It Up with Leigh Penner: Wishing You Unicorns


Oh my goodness, I am sorry this post is late!  I have been so scatterbrained lately and completely forgot to get it ready.  Leigh Penner and I post twice a month, on the second and fourth Wednesdays, to share a card using uninked stamps.  I chose to use this adorable Magical Unicorns set by My Favorite Things.


I cut white and black cardstock with the Sunshine Layers dies by Wplus9 Design Studio.  On the white piece, I stamped a random pattern of sunbursts and colored the centers with a Y13 Copic marker.  I then embellished the suns using Lemon Drop and Sugar Cube iridescent glitters by Martha Stewart.  You know I love all that sparkle!

I stamped and colored the unicorn image using various Copic markers.  I added silver Wink of Stella to the horn and hooves.  The wing is a separate piece of cardstock that I glittered with Sugar Cube.  I cut a white cloud with the Clouds 1 & 2 dies by Papertrey Ink, did some shading with a C1 Copic marker, and covered the whole thing with clear Wink of Stella.


I stamped a sentiment from Magical Unicorns onto a Double-Ended Banner die cut.  I layered a second banner underneath cut from Spring Rain cardstock.  Once I finished all the bits and pieces, I adhered it all to a Spring Rain card base.  It turned out super cute!

Make sure you hop over to Leigh's blog, To the Full, to see her Ink It Up post!

Stamps:  Magical Unicorns (My Favorite Things)
Ink:  Tuxedo Black (Memento)
Paper:  White, Spring Rain, True Black (Papertrey Ink)
Copic:  0, C1, Y13, B000, B00, B02, R20, R30, RV13, RV14, RV17
Misc:  Double-Ended Banner die, Clouds 1 & 2 die (Papertrey Ink); Sunshine Layers dies (Wplus9 Design Studio); Sugar Cube and Lemon Drop glitter (Martha Stewart); clear and silver Wink of Stella pens; glue pen

Tuesday, October 25, 2016

Colorful Fall Leaves


I managed to get a card done for this month's Papertrey Ink blog hop!  I loved the pretty autumn leaves and distressed wood background in the inspiration picture, so that is the direction I took for my card.  Even though I started it yesterday evening, I didn't finish it till just a bit ago.  You should have seen me laying on the sidewalk outside trying to catch the last of the evening light for a photo.  It looked pretty funny!


I colored a leftover piece of watercolor paper with three different shades of orange using a waterbrush.  (Orange Zest, Terracotta Tile, and Canyon Clay)  Aren't those colors gorgeous?  I cut out my leaves using a die from Leaf Prints and then stamped them with the matching vein image. 


For my background, I cut a piece of Stormy Sky cardstock into strips.  I swiped a white pigment ink pad over the strips for a weathered woodgrain look.   It made me giddy to see how well it worked!  I lightly inked the edges with Stormy Sky to give them some definition before gluing them onto a Vintage Cream card base.  The strips look just like wood planks.  Love it!


I stamped another piece of Vintage Cream cardstock with Background Basics: Sheet Music and Background Basics: Text Style, stamping off first to get a muted tone and deliberately not pressing down evenly so the image would be distressed.  I then sponged the edges with Classic Kraft ink.  The sentiment is from Graceful Greetings and I heat-embossed it using Not So Tarnished Copper by Powder Keg.  The whole piece is popped up with foam tape for dimension, mimicking the sheet music book in the inspiration photo.


Finally, I added a few Espresso sequins by Pretty Pink Posh.  Each one is filled with Cinnamon Stickles.  The card needed just a touch of sparkle to balance with the shine of the sentiment.  I was inspired by the acorns, naturally!  I love the finished card and am so happy I got into my studio to play this month.

Stamps:  Graceful Greetings, Leaf Prints (Papertrey Ink)
Ink:  VersaMark; Orange Zest, Terracotta Tile, Canyon Clay, Stormy Sea, Classic Kraft (Papertrey Ink); Sweet Tooth (My Favorite Things)
Paper:  Rustic Cream, Stormy Sea (Papertrey Ink); watercolor paper
Misc:  Leaf Prints die (Papertrey Ink); Not So Tarnished Copper embossing powder (Powder Keg); Espresso sequins (Pretty Pink Posh); Cinnamon Stickles

Sunday, October 23, 2016

Watercolor Truck

Here's the final card I created at the Stampin' Up workshop I attended earlier this week.  I spent a lot of time watercoloring this outdoor scene.  It was very therapeutic! 


I stamped the truck from Country Livin' onto a piece of watercolor paper, and using the masking technique, added pumpkins from Loads of Love and trees from Peaceful Pines.  I went over the pines with a waterbrush to soften the color.  I also used a Garden Green inkpad with the waterbrush to fill in the fluffier trees.

I had the most fun painting my truck with various inkpads and markers, all using a waterbrush.  I stole the idea to shade my truck with Pumpkin Pie from another workshop attendee.  The main truck color is Daffodil Delight, I think.  I used Pumpkin Pie on the pumpkins and Soft Suede on the pumpkin stems and wooden truck sides.  I used Smoky Slate and Basic Black on the tires.

I got my own idea to make the windows and headlights shiny using a VersaMarker and clear embossing powder.  (thanks to the haunted jars card)  I love how it looks!  You can see it better in this close-up photo.  There is just a bit of Smoky Slate shading underneath.


I mounted the watercolor panel on Tangerine Tango cardstock and wrapped Garden Green baker's twine around it, with a bow to secure it off-center.  I adhered that to a Crushed Curry card base.  I just now realized that I forgot to watercolor the sky.  lol  Oh well.  It was fun to do!

Stamps:  Country Livin', Peaceful Pines (Stampin' Up)
Ink:  Black Archival, Garden Green, Daffodil Delight (Stampin' Up)
Paper:  Tangerine Tango, Crushed Curry (Stampin' Up); watercolor paper
Misc:  Soft Suede, Pumpkin Pie, Smoky Slate markers (Stampin' Up); 

Saturday, October 22, 2016

Thankful Leaves

I'm back to post another workshop card!  This one uses the lovely Vintage Leaves stamp set and Woodland embossing folder.


I inked the embossing folder with Crumb Cake ink before running it through the machine using Crumb Cake cardstock.  I got a bit heavy-handed with the ink so there is some "shading" on my tree trunks.  Hey, that's realistic anyway!  lol  I added gold Wink of Stella into the tiny grooves for some sparkle.

I embossed the leaf with gold powder on Crushed Curry cardstock and sponged ink on it randomly using Old Olive, Cajun Craze, and Pumpkin Pie inkpads.  Then I cut it out using the matching die.  I embossed my sentiment from Sheltering Tree with gold powder on Cajun Craze cardstock and layered it on some gold foil paper.

I layered all the various ribbons and trim underneath my two leaves.  The second leaf is a plain one cut from Cajun Craze cardstock.  Everything is adhered to a Crumb Cake card base.  All those pretty autumn colors are quite appropriate for this time of year!  I love fall.

Stamps:  Vintage Leaves, Sheltering Tree (Stampin' Up)
Ink:  Crumb Cake, Old Olive, Cajun Craze, Pumpkin Pie (Stampin' Up); VersaMark
Paper:  Crumb Cake, Crushed Curry, Cajun Craze (Stampin' Up)
Misc:  Woodland embossing folder, Leaflets dies (Stampin' Up); gold Wink of Stella pen; gold embossing powder; 5/8" burlap ribbon, 5/8" gold satin ribbon, gold sequin trim, gold baker's twine (Stampin' Up)

Thursday, October 20, 2016

Vintage Leaf Gatefold

Here's the third card from the Stampin' Up workshop I attended at my demo's house.  This is a gate-fold style card where it opens in the center.


The base is Sweet Sugarplum cardstock and the patterned paper panels are from the Blooms & Bliss dsp pack.  I stamped the Vintage Leaves images on a piece of watercolor paper using Mint Macaron, Sweet Sugarplum, and Rich Razzleberry inks.  Then I used a waterbrush to spread around the ink for a watercolor look.


I mounted the watercolor panel on a piece of Mint Macaron cardstock and wrapped some ribbon and lace around one side.  I adhered that to one side of the gatefold card.  I stamped a sentiment from Teeny Tiny Wishes on a Very Vanilla oval and matted it with Mint Macaron. (both cut using punches)  The sentiment is popped up for dimension.


On the inside of the card, I adhered a piece of Very Vanilla cardstock that I stamped with two of the leaves.


Quite simple!  It would be easy to do this design in different color combos.

Stamps:  Vintage Leaves, Teeny Tiny Wishes (Stampin' Up)
Ink:  Mint Macaron, Sweet Sugarplum, Rich Razzleberry (Stampin' Up)
Paper:  Mint Macaron, Sweet Sugarplum, Very Vanilla, Blooms & Bliss dsp (Stampin' Up); watercolor paper
Misc:  Oval punch, Large Oval punch (Stampin' Up); 1/2" Very Vanilla lace ribbon, 3/8" Mint Macaron sheer linen ribbon (Stampin' Up); waterbrush

Wednesday, October 19, 2016

Haunted Jars and 400 Blog Posts

Can you believe it?  I'm celebrating 400 posts here on my blog today!  It may be a drop in the bucket to some, but for me it feels like a huge accomplishment.  It represents a determination to keep creating through self-doubt, fear, and the big old comparison monster.  I enjoy creating my little works of art.  They make me smile!  Scrolling through my blog is like taking a trip through time.  Today, I'm sharing my favorite card from the Stampin' Up workshop I attended two days ago.


It uses the super cute Jar of Haunts stamp set.  This has been on my wish list since I first laid eyes on it.  I want it even more now.  lol   I stamped the jars on watercolor paper and used markers with a waterbrush to add color.  I also used markers for the eyeballs.  Just a bit creepy!  I cut the jars out with the matching dies.

I stamped the drippy goo image repeatedly across the top of text print paper and colored it in with a Pear Pizzazz marker.  To get the shiny effect, I colored it again with a VersaMark marker and embossed with clear powder.  It looks really cool in person. 


I stamped two spiders directly on the text paper and drew the web lines using a ruler.  I did the same thing inside the card.


I stamped the sentiment and punched it out using the old Word Window punch by Stampin' Up.  After matting the text print, I adhered the jars and sentiment using foam dots for dimension. 

Like I said, this card was my favorite to make at the workshop.  I will be back tomorrow to post another one from the same day.  Here's to many more creative projects and posts!

Stamps:  Jar of Haunts, Teeny Tiny Wishes (Stampin' Up)
Ink:  Basic Black (Stampin' Up)
Paper:  Basic Black, Tangerine Tango, Very Vanilla, Newsprint dsp (Stampin' Up)
Misc:  Everyday Jars dies, Word Window punch (Stampin' Up); Pear Pizzazz, Pool Party, Wisteria Wonder, Tempting Turquoise, Smoky Slate markers (Stampin' Up); VersaMark marker; waterbrush; clear embossing powder

Tuesday, October 18, 2016

Fall Watercolor

I went to a card-making workshop at my Stampin' Up demonstrator's house yesterday.  I haven't done that in a while, but a friend encouraged me to join her there.  We made five different cards with an autumn theme.  (well, one was Halloween)  I will be posting them over the next few days.  This first card used a watercolor block technique on glossy paper.


I smooshed four different inkpads (see below) onto a large acrylic block, spritzed it with water, and then stamped the block itself onto a piece of glossy paper.  It looks really cool.  A bit unpredictable.  That random blob on the right edge drives me crazy, but I am practicing the art of letting go.  lol

I stamped the tree silhouette and sentiment in Early Espresso ink.  After heat setting to make sure it was completely dry, I stamped tiny leaves on the branches and ground in two different colors.  Then I mounted it on a card base.  My daughter really liked this one.  Bonus - it's flat for mailing!

Stamps:  Sheltering Tree (Stampin' Up)
Ink:  Peekaboo Peach, Early Espresso, So Saffron, Delightful Dijon, Calypso Coral (Stampin' Up)
Paper:  Peekaboo Peach, Early Espresso, glossy paper (Stampin' Up)
Misc:  large acrylic block, heat gun

Friday, October 14, 2016

Whole Llama Love

Yesterday, I watched a video by Jennifer McGuire showing a sentiment backdrop technique.  You can find it at her blog here.  I thought it would be fun to try out using the Llama Love stamp set by My Favorite Things.


I first cut a piece of white cardstock using a Blueprints 13 die, also by My Favorite Things, and stamped the two llamas in the center.  I also stamped them to cut out for masking.  After coloring the llamas with Copic markers, I put the masks in place and stamped the sentiment over top with black and kraft ink.  I managed to get the backdrop slightly off center, which bugs me quite a bit, but I know my husband will not care in the least and I made it for him.  I can see how a Misti tool would be fabulous for a technique like this.  I eyeballed the stamping using the edge of my acrylic block for spacing. 

At the last minute, I decided to stamp a little heart from Beast Friends.  It's colored with a Copic marker and there's a layer of Wink of Stella on top.  I love the teeny pop of red and the subtle shimmer.  You can view it better in the close-up photo.


I mounted my llamas on a Kraft card base.  The whole thing took me less than an hour.  Woot!  I plan to slip this card into my husband's bag the next time he goes on a business trip.  It'll be a nice surprise and besides, he used to talk about owning llamas on his "gentleman farm", so he will get a huge kick out of the pun!

Stamps:  Llama Love, Beast Friends (My Favorite Things)
Ink:  Tuxedo Black (Memento); Classic Kraft (Papertrey Ink)
Paper:  White, Kraft (Papertrey Ink)
Copic:  E42, E55, E57, E59, R29
Misc:  Blueprints 13 die (My Favorite Things); clear Wink of Stella pen

Wednesday, October 12, 2016

Ink It Up with Leigh Penner: Moon Blast


This year is just flying by.  How are we already into October?  It was downright cold outside this morning when my daughter left for the bus.  The trees are starting to show their autumn colors.  It's my favorite time of year!  My son Benjamin received his mission call two weeks ago and we are getting him prepared to leave.  He reports to the MTC (missionary training center) on Nov 9th and will be serving in the Utah Salt Lake City East mission.  Change is in the air.

It's also time for the newest Ink It Up post with Leigh Penner.  We share a project on the second and fourth Wednesdays of each month using uninked stamps.  When cleaning out my scrap drawer recently, I found this piece of metallic star paper already cut to size.  I simply adhered it to a white card base.  There it sat for a couple of days until the Half Pint Heroes set by Waltzingmouse caught my attention.  Sadly, that company is out of business now.  I saw the fun rocket ship and decided to re-create a card design I made several years ago. (found here)


Waltzingmouse made such wonderful stamps!  Thankfully, several of Claire's designs are now available through Gina K Designs.  Not the Half Pint series at this point, but you never know what will come in the future.  I stamped the rocket ship on a piece of white cardstock and colored it with Copic markers.  I added Wink of Stella on the flames and Glossy Accents over the boy's head.  Hopefully you can see it in these close-up photos.


I used the Mini Bubbles embossing folder by Paper Studio on a gray cardstock circle, shading it with Soft Stone ink, and then spritzing it with Perfect Pearl Mist.  And there you have it - a moon.  I love the shimmer!  It's almost otherworldly.  I stamped the sentiment on white cardstock and cut it apart into words.  The rocket ship is hand-cut and popped up for dimension.


This card was fun to make.  It's about time I got these darling stamps inked!  Once I got an idea, it came together very quickly.  Make sure you pop over to Leigh's blog, To the Full, to see her Ink It Up card!

Stamps:  Half Pint Heroes (Waltzingmouse)
Ink:  Tuxedo Black (Memento); Soft Stone (Papertrey Ink)
Paper:  White (Papertrey Ink); Rockstar Stack dsp (DCWV)
Copic: 0, C1, C3, C5, E00, E30, E42, R05, R20, R24, R29, BG72, BG75, BG78, BG99
Misc:  Standard Circles Large die (Spellbinders); Mini Bubbles embossing folder (Paper Studio); Perfect Pearl Mist, Glossy Accents (Ranger); clear Wink of Stella; ink sponging tool